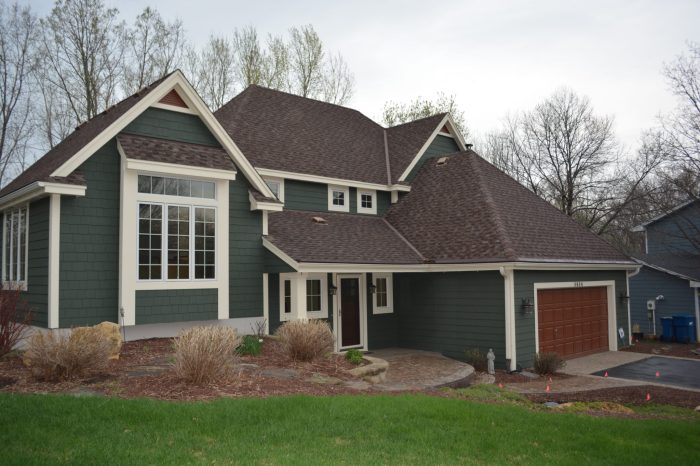
Replacing a Piece of Hardie Plank Siding A Comprehensive Guide
Replacing a piece of Hardie plank siding can seem daunting, but with a methodical approach and the right information, it’s a manageable task. This guide will walk you through every step, from assessing the damage to finishing touches, ensuring a professional-looking result. We’ll cover everything from identifying repairable damage to choosing the perfect replacement material, helping you understand the process from start to finish.
Properly replacing a piece of damaged Hardie plank siding is crucial for maintaining the structural integrity and aesthetic appeal of your home. Understanding the different types of damage, necessary materials, and installation techniques ensures a long-lasting repair that withstands the elements. This guide will detail the entire process, from evaluating the damage to final inspections, providing a clear and concise approach for successful replacement.
Assessing the Damage: Replacing A Piece Of Hardie Plank Siding
Source: uswindowsandexteriors.com
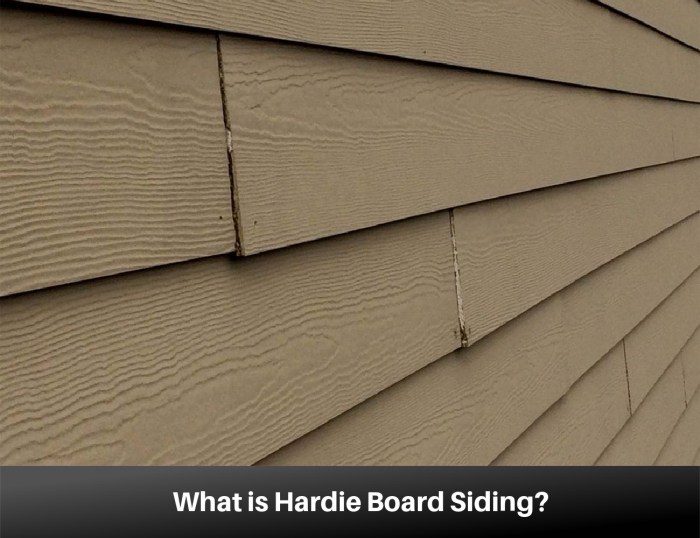
Properly assessing damage to Hardie plank siding is crucial for determining whether a repair is sufficient or if a full replacement is necessary. Ignoring apparent damage can lead to further deterioration and more costly repairs down the road. This section details common indicators of needing a replacement, focusing on visual identification and severity levels.
Identifying the extent of damage to Hardie plank siding is vital for making informed decisions. A comprehensive evaluation helps avoid costly mistakes by differentiating between minor, repairable issues and more serious, irreparable problems.
Common Signs of Necessary Replacement
Evaluating Hardie plank siding for damage involves a thorough visual inspection. Visible cracks, holes, or significant discoloration can indicate underlying problems. Look for signs of water intrusion, such as warping, bubbling, or mold growth, as these can be early indicators of rot. Uneven surfaces or noticeable sagging might also point to a compromised structure that needs replacement.
Types of Damage Requiring Replacement
Various types of damage necessitate the replacement of Hardie plank siding. Cracks, especially large or numerous ones, compromise the integrity of the siding. Holes, whether caused by impact or other factors, can lead to further damage and water penetration. Rot, often evident by soft spots or discoloration, indicates significant deterioration that needs to be addressed. Water damage, such as swelling or warping, typically results from prolonged exposure to moisture and weakens the siding.
Distinguishing Between Repairable and Non-Repairable Damage
Differentiating between repairable and non-repairable damage is essential for proper maintenance. Small cracks, less than an inch in length, might be repairable with patching. However, extensive cracking, especially those spanning multiple planks, usually indicates structural weakness. A single small hole can sometimes be filled, but multiple or large holes are generally irreparable. Rotting affecting a small area might be treatable with the replacement of the affected section. However, significant rot affecting several planks often demands complete replacement to prevent further issues. Water damage to a limited area, if caught early, can sometimes be addressed with repair; however, significant water damage often causes irreparable damage.
Severity Levels and Recommended Actions
| Damage Type | Severity Level | Recommended Action |
|---|---|---|
| Small crack (less than 1 inch) | Low | Repair |
| Extensive cracking (spanning multiple planks) | High | Replacement |
| Small hole | Low | Repair |
| Multiple or large holes | High | Replacement |
| Minor rot (small affected area) | Low | Repair/Replacement of affected section |
| Significant rot (affecting several planks) | High | Replacement |
| Minor water damage (limited area) | Low | Repair |
| Significant water damage (extensive warping/bubbling) | High | Replacement |
Gathering Necessary Materials
Replacing a piece of Hardie plank siding requires careful preparation and the right materials to ensure a lasting and watertight repair. Proper selection of tools and materials is crucial for a successful and aesthetically pleasing outcome. A thorough understanding of the necessary components, including the specific Hardie plank type, fasteners, and sealants, is essential to avoid costly errors or potential issues down the road.
Careful consideration must be given to the exact type of Hardie plank siding to be used for the replacement. Matching the existing siding’s material and finish is critical to maintain the aesthetic integrity of the home’s exterior. Using the wrong type can lead to noticeable discrepancies in appearance and potentially compromise the long-term structural integrity of the siding.
Required Tools and Materials, Replacing a piece of Hardie Plank siding
A comprehensive toolkit is essential for a smooth and efficient installation. This includes, but is not limited to, a reciprocating saw, a utility knife, a measuring tape, a pencil, a drill, various drill bits, and safety glasses. A ladder or scaffolding is also necessary for accessing higher sections of the house. Additional tools such as a level, a pry bar, and a hammer might also be beneficial, depending on the specific situation.
Hardie Plank Siding Specifications
Correctly matching the Hardie plank siding is critical for a successful repair. Using the appropriate siding material type and grade is essential for ensuring a lasting repair and a seamless aesthetic. Different Hardie plank siding types offer varying levels of durability and resistance to weathering and moisture. Consult the manufacturer’s specifications to determine the appropriate type for your climate and the specific siding application.
Fastener Specifications
Selecting the correct fasteners is paramount for a strong and secure installation. Improper fasteners can lead to the premature failure of the repair. The following table Artikels the recommended fasteners, including screw sizes and specifications.
| Fastener Type | Size | Material | Specifications |
|---|---|---|---|
| Screws | #8 x 2-1/2″ | Stainless Steel | Suitable for most Hardie plank applications. Choose a screw with a slightly larger diameter than the siding’s groove to ensure proper fastening. |
| Nails | 8d | Galvanized | Suitable for thicker or heavier Hardie plank materials. Ensure proper nail-setting techniques to prevent cracking or damage to the siding. |
Caulk and Sealant Options
Choosing the right caulk and sealant is vital for creating a watertight seal around the replacement piece. This prevents moisture intrusion, which can cause damage to the siding and underlying structure. Different types of caulk are available for various applications. For example, a paintable exterior caulk is ideal for filling gaps around the replacement siding, while a sealant is used for larger gaps or areas that require a more robust seal. Consider the material and application area when selecting the appropriate caulk or sealant.
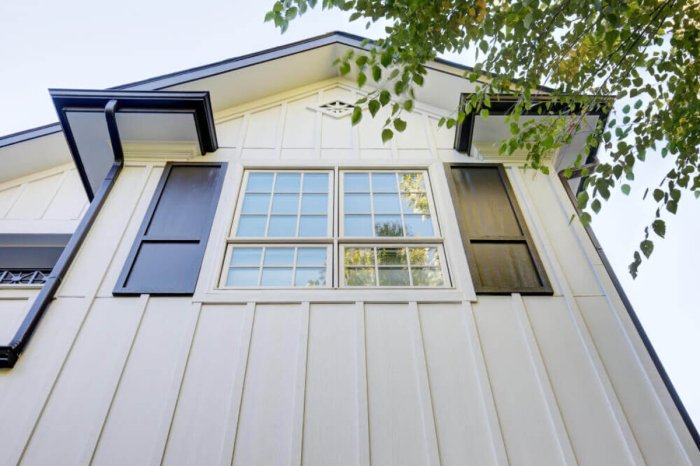
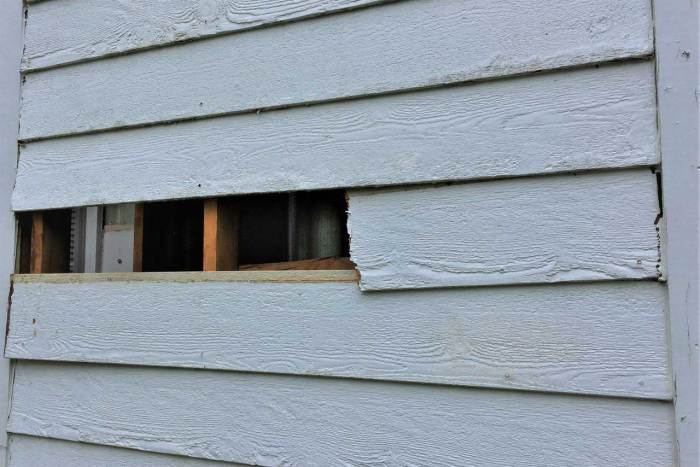
Preparation and Removal
Source: peakroofingcontractors.com
Safe and efficient removal of damaged Hardie plank siding requires careful planning and execution. This section details the steps involved, emphasizing safety precautions and the identification of underlying issues that might contribute to the problem. Proper technique prevents further damage and ensures a smooth replacement process.
Thorough preparation is key to a successful siding replacement project. The removal process must be executed with precision to avoid compromising the integrity of the structure. This includes addressing any issues that may have caused the initial damage, ensuring the new siding is installed correctly, and protecting the surrounding areas from damage.
Safety Precautions
Safety should be paramount during siding removal. Proper personal protective equipment (PPE) is crucial to prevent injuries. This includes safety glasses, work gloves, and sturdy footwear. Hearing protection is also recommended for operating power tools. Working at heights necessitates the use of fall protection equipment, such as harnesses and safety lines. Ensure that all workers are properly trained and understand the procedures for safe work practices.
Identifying Underlying Issues
Inspect the damaged area meticulously for underlying problems that may have contributed to the siding damage. Look for signs of moisture intrusion, rot, or insect infestation. Inspect the sheathing beneath the damaged siding for signs of water damage, rot, or insect infestation. Addressing these underlying issues is critical to prevent future problems and ensure the long-term durability of the replacement siding.
Removing the Damaged Siding Section
Carefully remove the damaged Hardie plank siding section. Use a pry bar or a specialized siding removal tool to gently lift the siding away from the framing. Work systematically, ensuring not to damage the surrounding areas or the underlying structure.
Cutting the Old Hardie Plank Siding
Cut the old Hardie plank siding to the correct size and shape using a reciprocating saw with a Hardie plank blade. Ensure accurate measurements before making any cuts. A sharp blade is essential to achieve clean cuts. Use a utility knife or a sharp razor blade to make precise cuts for smaller or detailed adjustments.
Removal Process Summary
| Step | Description | Safety Measures | Tool Requirements |
|---|---|---|---|
| 1 | Inspect the area for underlying issues. | Use safety glasses and gloves. | Visual inspection tools |
| 2 | Wear appropriate PPE. | Fall protection equipment for heights. | N/A |
| 3 | Carefully remove the damaged siding section using a pry bar or specialized siding tool. | Ensure a secure work area. | Pry bar, siding removal tool |
| 4 | Cut the old Hardie plank siding to the correct size and shape using a reciprocating saw with a Hardie plank blade. | Wear safety glasses and hearing protection. | Reciprocating saw, Hardie plank blade, utility knife |
| 5 | Dispose of the old siding properly. | Follow local regulations for disposal. | N/A |
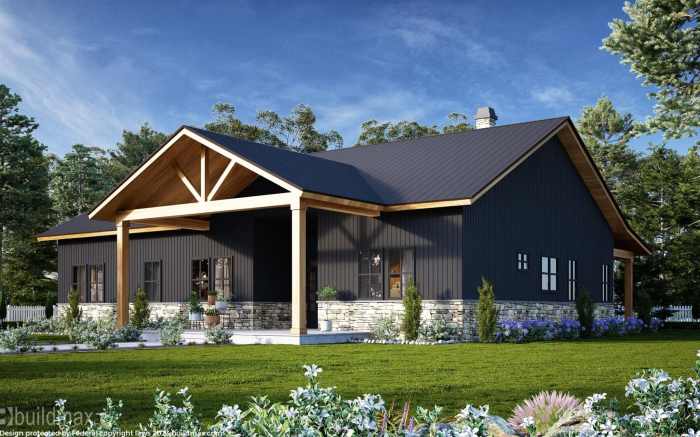
Installation of the Replacement Siding

Source: remodelingcalculator.org
Installing new Hardie plank siding requires careful attention to detail and adherence to proper techniques. A precise and well-executed installation ensures a lasting and aesthetically pleasing result, extending the lifespan of the siding. This section details the process, focusing on securing the new siding, aligning it correctly, and addressing various installation methods.
Securing the New Siding
Properly securing the new siding to the exterior wall is paramount for its longevity and structural integrity. Fasteners, such as nails or screws, must be appropriate for the siding material and the underlying structure. Using the correct fastener type and size, and installing them at the recommended spacing, prevents issues like cracking or detachment. The fastener placement is crucial for the overall stability of the siding.
Alignment and Gaps
Maintaining proper alignment and consistent gaps between siding panels is essential for a professional and visually appealing finish. Using a straightedge and level to ensure the new panels are properly aligned minimizes the risk of unevenness or gaps. Gaps, often called “expansion joints,” should be consistently sized for the Hardie plank material and the climate conditions, allowing for movement without compromising the siding’s integrity. Measuring and marking are critical steps in ensuring precise alignment.
Installation Methods
Various methods exist for installing Hardie plank siding, each with its advantages and disadvantages. A common method involves attaching the siding directly to the sheathing. This approach can be efficient but might require more specialized tools. Alternative methods include using furring strips or other support systems, which may be preferable for irregular walls or specific siding designs. Understanding these different methods and their suitability for the particular project is vital.
Steps for Installing Replacement Hardie Plank Siding
- Prepare the installation area, ensuring the underlying structure is clean and sound. This includes removing any loose debris or damaged sections of the existing siding.
- Install any necessary flashing or trim pieces to protect the edges and joints of the new siding.
- Carefully measure and cut the new siding panels to the required lengths.
- Position the first panel according to the established alignment marks, ensuring the proper gap between the panels.
- Secure the panel using appropriate fasteners, maintaining the recommended spacing and ensuring proper penetration.
- Continue installing subsequent panels, carefully aligning them with the previously installed ones and maintaining the consistent gaps.
- Inspect the installation for any misalignment or gaps and make necessary adjustments.
- Apply sealant to all joints and seams to prevent water penetration and improve the overall appearance.
- Verify the completed installation for proper alignment and secure fastening.
Fastening Techniques
Using the correct fastening techniques is critical for securing the Hardie plank siding. Employing appropriate fasteners, ensuring adequate penetration, and maintaining consistent spacing are essential for a strong and durable installation. Over-tightening fasteners can damage the siding, while under-tightening can lead to looseness. Following the manufacturer’s recommendations for fastener type and spacing is critical.
Troubleshooting Table
| Step | Potential Problem | Solution |
|---|---|---|
| Panel Alignment | Uneven gaps or misaligned panels | Use a straightedge and level to adjust the panel position. |
| Fastener Placement | Inadequate fastener penetration or spacing | Use the appropriate fasteners and maintain recommended spacing; adjust as needed. |
| Sealant Application | Improper sealant application or insufficient coverage | Ensure sealant is applied evenly and completely to all joints and seams. |
| Fastener Tightening | Over-tightening or under-tightening fasteners | Check the manufacturer’s recommendations and adjust as needed to achieve proper tightening. |
Finishing Touches and Inspection
Completing the siding replacement project requires meticulous attention to detail in the finishing touches. This phase ensures a watertight, aesthetically pleasing installation and a long-lasting result. Proper sealing, ventilation, and drainage are crucial to prevent future issues. Thorough inspection after completion identifies and addresses any potential problems before they escalate.
The final steps of the siding replacement project are vital for the longevity and performance of the new installation. A watertight seal is paramount to prevent water intrusion, which can lead to costly repairs down the line. Careful attention to ventilation and drainage ensures proper air circulation and prevents moisture buildup. A comprehensive inspection, covering all critical areas, ensures a flawless final product.
Caulking and Sealing
Proper caulking and sealing around the new siding is essential to create a watertight barrier. This prevents water from seeping into the wall cavity, causing rot, mold, and structural damage. Applying a quality sealant to all joints, seams, and intersections between the new siding and existing framing or other components is critical. Use a sealant specifically designed for exterior applications.
Caulking and Sealing Procedure
Apply a bead of caulk to the joint or gap, ensuring it fills the entire space. Use a caulking gun for consistent application. Smooth the caulk with a damp finger or a caulk-smoothing tool to create a clean, even surface. Allow the caulk to cure according to the manufacturer’s instructions before proceeding with any other steps. Overlap the caulk beads to prevent gaps. Clean up any excess caulk immediately with a damp cloth.
Ventilation and Drainage
Adequate ventilation and drainage around the replaced siding section are crucial to prevent moisture buildup. This helps to ensure the longevity of the siding and the underlying structure. Inspect the existing ventilation system around the replaced section and make any necessary adjustments. Ensure proper air circulation. Check for any blocked or clogged drainage channels.
Ventilation and Drainage Procedure
Inspect the existing ventilation and drainage systems around the replacement area. Ensure there are no blockages in gutters, downspouts, or other drainage pathways. If necessary, clear out any debris or clogs. Consider adding or adjusting ventilation openings to ensure proper air circulation around the replaced section of siding.
Inspection for Imperfections
A thorough inspection of the completed installation identifies any imperfections that may have been missed during the installation process. This proactive approach prevents minor issues from becoming major problems later. Addressing imperfections promptly helps maintain the structural integrity and aesthetic appeal of the installation.
Inspection Checklist
| Area | Potential Issues | Action |
|---|---|---|
| Seams and Joints | Gaps, uneven caulking, missing caulk | Recaulk or reseal as needed |
| Corners and Edges | Cracks, gaps, or exposed fasteners | Fill cracks, add caulk, and secure fasteners |
| Fasteners | Loose fasteners, missing fasteners, or incorrect type | Tighten, replace, or use appropriate fasteners |
| Ventilation | Blocked or inadequate ventilation | Clear blockages, adjust vents, or add vents |
| Drainage | Clogged gutters or downspouts, improper drainage | Clear gutters and downspouts, ensure proper drainage |
| Siding Alignment | Misaligned siding panels, gaps | Adjust or replace misaligned panels |
Troubleshooting Common Issues
Replacing Hardie plank siding can sometimes present unexpected challenges. Thorough preparation and attention to detail during installation are crucial to avoid costly repairs or a less-than-desirable final product. Understanding potential problems and their solutions will minimize the risk of these issues.
Careful assessment of the existing siding and surrounding structure is essential to anticipate and mitigate problems before they occur. This proactive approach often prevents more significant complications and ensures a smoother replacement process. Addressing potential issues promptly can save time, money, and frustration.
Improper Alignment
Misaligned siding panels can lead to an uneven or unprofessional appearance. Careful measuring and marking are essential for proper placement. Using a straightedge or level consistently during installation helps maintain alignment throughout the process. Incorrectly aligned panels can create gaps, compromising the weather resistance of the siding. Ensuring accurate panel positioning prevents gaps and improves the final aesthetic. Adhering to the manufacturer’s guidelines for panel spacing and overlap is key.
Incorrect Fastener Placement
Improper fastener placement can lead to weakened seams and potential structural issues. Using the correct fastener type and spacing is crucial for a robust installation. Fasteners that are too close together can damage the siding material, while those too far apart will compromise structural integrity. Properly sized and spaced fasteners are essential for securing the panels to the underlying structure. Ensuring sufficient fastener penetration into the supporting structure is equally important.
Water Damage
Water damage beneath the siding, often concealed, can lead to rot or other structural issues. Checking for signs of moisture before starting the replacement is important. Removing damaged components is essential before installing new siding. Properly sealing seams and ensuring proper drainage of water around the exterior of the house are crucial to preventing future water damage. Professional inspection of the area for potential hidden water damage issues is highly recommended.
Potential Problems and Solutions
| Potential Problem | Solution |
|---|---|
| Misaligned siding panels | Double-check measurements, use a straightedge or level, and ensure proper panel alignment during installation. |
| Incorrect fastener placement | Use the correct fastener type and spacing as per the manufacturer’s recommendations. Verify fastener penetration into the supporting structure. |
| Water damage beneath the siding | Inspect for signs of moisture and rot. Remove any damaged components before installation. Ensure proper drainage and sealing around the exterior of the house. |
| Damaged/missing siding panels | Replace damaged or missing panels with new, matching materials to maintain a uniform appearance and ensure the integrity of the structure. |
| Poorly prepared substrate | Ensure the substrate is clean, dry, and free of debris before installing new siding. |
Specific Considerations
Choosing the right Hardie plank siding type is crucial for the longevity and performance of your home’s exterior. Different types are designed to handle various environmental stresses, impacting the overall lifespan and cost-effectiveness of the project. Careful consideration of local climate and environmental factors is essential for optimal results.
Understanding the unique characteristics of different Hardie plank siding types allows homeowners to select the best option for their specific needs. This includes factors such as wind resistance, fire resistance, and moisture resistance, all of which contribute to the overall durability and aesthetic appeal of the siding. By understanding these factors, you can make informed decisions that will protect your investment.
Hardie Plank Siding Types and Suitability
Various Hardie plank siding types cater to different environmental conditions. The best choice depends on the specific climate and potential stressors of the area. Factors like the average annual rainfall, wind speeds, and the frequency of extreme weather events play a significant role in determining the ideal siding type.
Climate-Specific Considerations
Selecting the appropriate siding material is directly related to the local climate. Areas with high winds might require siding with enhanced wind resistance, while regions prone to heavy rainfall or moisture require siding with exceptional moisture resistance. Conversely, areas with a dry climate might not require the same level of moisture resistance. A well-informed choice will extend the siding’s lifespan and minimize future repair needs.
Comparing Hardie Plank Siding Types
Different Hardie plank siding types exhibit varying degrees of performance in different environmental conditions. The table below provides a comparative overview of common types, highlighting their key characteristics.
| Siding Type | Wind Resistance | Fire Resistance | Moisture Resistance | Suitability |
|---|---|---|---|---|
| HardiePlank® lap siding | Good | Excellent | Very Good | Suitable for most climates, especially those with moderate to high winds and occasional rainfall. |
| HardiePlank® board and batten siding | Good | Excellent | Very Good | Suitable for a wide range of climates. Offers a classic aesthetic. |
| HardiePlank® vertical siding | Excellent | Excellent | Very Good | Ideal for high-wind areas and regions with a moderate amount of rainfall. Provides a unique aesthetic. |
| HardiePlank® Smooth siding | Good | Excellent | Very Good | Suitable for various climates but often used where a smooth finish is desired. |
Note: The performance characteristics of each type are subject to specific installation practices and can vary depending on the specific conditions of your home and location. Consult local building codes and professionals for accurate assessments.
Final Summary
In conclusion, replacing a piece of hardie plank siding involves careful assessment, meticulous preparation, and precise installation. Following the steps Artikeld in this guide, you’ll be equipped to handle the task confidently and efficiently. By addressing any underlying issues and choosing the right materials, you can achieve a strong, durable, and aesthetically pleasing result that protects your home’s exterior for years to come.