Hardie Board Siding Replacement Guide
Hardie board siding replacement is a significant home improvement project, often necessary due to damage, age, or aesthetic considerations. Understanding the process, from preparation to installation, is key to a successful outcome. This guide will walk you through the essential steps, covering everything from material selection to troubleshooting common issues. We’ll explore various options, including full replacements and partial repairs, helping you make informed decisions about your project.
Choosing the right approach, whether a full replacement or targeted repair, depends on factors like the extent of damage and your budget. This comprehensive guide will break down the process into manageable sections, ensuring a smooth and informed journey. We’ll also discuss essential considerations, such as cost, permits, and contractor selection, empowering you to make the best decisions for your home.
Introduction to Hardie Board Siding Replacement
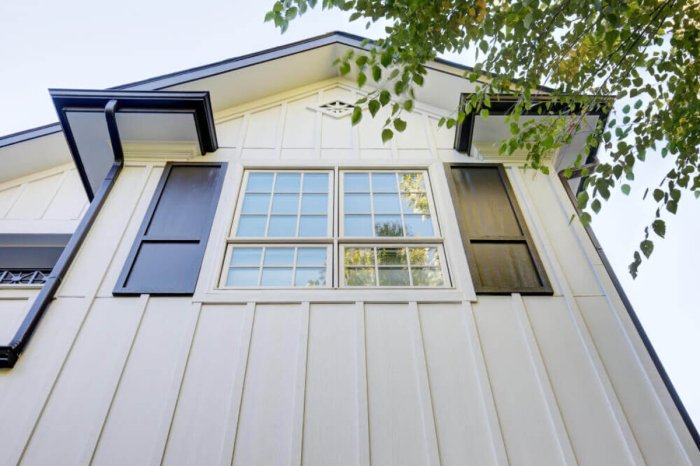
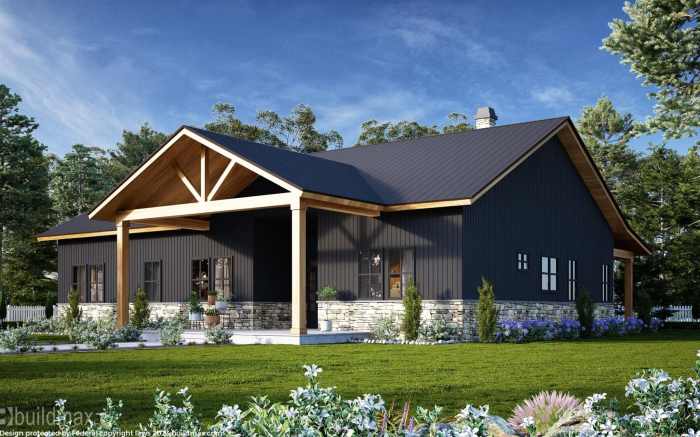
Hardie board siding, a popular choice for its durability and aesthetic appeal, often requires replacement due to various factors. Proper maintenance and timely intervention can significantly extend its lifespan. Replacing this siding is a significant undertaking, but understanding the reasons behind the need, available options, and the process itself is crucial for homeowners.
Replacing Hardie board siding is a common home improvement project. The siding, while resilient, can suffer damage from weather exposure, impact, or aging. This replacement can be necessary to maintain the structural integrity of a home, enhance its curb appeal, or improve its energy efficiency.
Factors Influencing Hardie Board Siding Replacement
Several factors influence the decision to replace Hardie board siding. Damage from storms, pests, or other events often necessitates replacement. Significant degradation over time, leading to visible cracks, warping, or peeling, also signals the need for replacement. Aesthetic considerations, such as a desire for a different color or style, can also drive the replacement decision. Ultimately, the homeowner must weigh the cost, time, and complexity of replacement against the potential benefits and risks.
Typical Steps in a Hardie Board Siding Replacement Project
A Hardie board siding replacement project typically involves several steps. First, a thorough assessment of the existing siding is essential to identify areas needing replacement and to plan the scope of work. Demolition of the old siding is next, followed by the preparation of the wall surface. This preparation includes repairing any damage, ensuring proper insulation, and installing the new Hardie board siding panels. Installation involves careful measurement, precise cuts, and proper attachment. Finally, caulking and finishing touches ensure a smooth and watertight result.
Hardie Board Siding Replacement Options
Different options exist for replacing Hardie board siding, each with its implications in terms of cost, time, and complexity. The choice depends on the extent of the damage and the homeowner’s budget and timeframe.
| Option | Cost | Time | Complexity |
|---|---|---|---|
| Full Replacement | High | Long | High |
| Partial Repair | Low | Short | Low |
| Partial Replacement (Section by Section) | Medium | Medium | Medium |
Full replacement involves removing all existing siding and installing new panels. It’s a comprehensive approach suitable for significant damage or aesthetic updates. Partial repair focuses on replacing only damaged sections, suitable for localized issues. A partial replacement, section by section, is a compromise between complete replacement and minor repair, offering a balanced approach to addressing damage. Each option requires careful consideration of the specific situation to ensure a cost-effective and efficient solution.
Preparation for Hardie Board Siding Replacement
Proper preparation is crucial for a successful and safe Hardie board siding replacement project. This involves meticulous planning, careful material selection, and adherence to safety protocols. A well-executed preparation phase minimizes potential issues and maximizes the efficiency of the replacement process.
Site Assessment and Material Gathering
Thorough site assessment is essential before starting any siding replacement project. This includes evaluating the existing siding condition, identifying any structural issues, and determining the extent of the replacement needed. Inspect for signs of damage, rot, or moisture intrusion, as these could indicate underlying structural problems requiring attention. Gathering necessary materials beforehand is equally important. This includes ordering the correct type and quantity of Hardie board siding, flashing, and other associated components. Accurate measurements and specifications are vital to ensure the right materials are purchased and avoid costly errors.
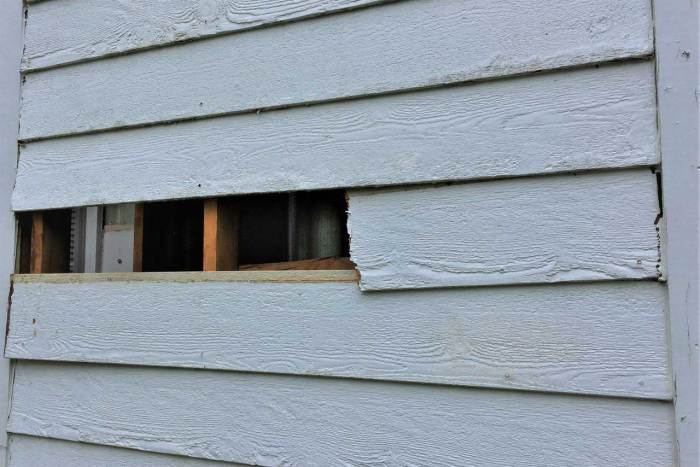
Removing Old Hardie Board Siding
Removing the old Hardie board siding is a crucial step in the replacement process. This often requires specialized tools and techniques to avoid damaging the underlying structure or injuring yourself. Adherence to safety procedures is paramount. Wearing appropriate personal protective equipment (PPE), such as safety glasses, gloves, and a dust mask, is mandatory. Proper handling of the old siding is necessary to prevent potential injuries.
Safety Procedures and Techniques, Hardie board siding replacement
Safe removal techniques are critical to avoid potential injuries. Using proper lifting techniques when removing heavy panels and working from a safe height are essential. Proper scaffolding or ladder placement, along with adhering to established safety protocols, is paramount. Never attempt to remove panels that are significantly damaged or unstable.
Common Mistakes to Avoid During Removal
Some common mistakes during Hardie board siding removal include improper use of tools, inadequate safety measures, and overlooking potential structural issues. Skipping crucial safety precautions, like wearing appropriate PPE, can lead to serious injuries. Ignoring signs of structural damage can lead to further issues and complications. Failing to secure the work area properly, or overlooking the need for adequate support, can lead to accidents.
Tools Needed for Removal
The tools required for removing Hardie board siding include, but are not limited to:
- Pry bars (various sizes)
- Safety Glasses
- Gloves
- Dust mask
- Utility knife
- Hammer
- Screwdriver (various types)
- Measuring tape
- Safety harnesses (if working from heights)
- Scaffolding/Ladders
- Drill with appropriate bits
A comprehensive tool kit is essential for a smooth and safe removal process. Improper tool usage can lead to damaged materials or personal injuries.
Steps in Removing Hardie Board Siding
Careful execution of the removal process is essential. A step-by-step approach ensures that the old siding is removed efficiently and safely.
| Step | Description | Image Description |
|---|---|---|
| 1 | Inspect the area for any loose or damaged siding. Mark the areas that need removal. | A picture of a house with highlighted areas of siding needing replacement, showing signs of damage. |
| 2 | Wear appropriate personal protective equipment (PPE), including safety glasses, gloves, and a dust mask. | A person wearing safety glasses, gloves, and a dust mask while standing near a house. |
| 3 | Using a pry bar, carefully loosen the nails or screws holding the siding to the sheathing. Start from the bottom and work your way up. | A person using a pry bar to remove a Hardie board siding panel, with a focus on the pry bar and the panel. |
| 4 | Once loosened, carefully remove the siding panel. Avoid using excessive force, which can damage the siding or surrounding areas. | A removed Hardie board siding panel on the ground, showing the backside of the panel and the sheathing beneath. |
| 5 | Dispose of the removed panels properly. | A picture showing proper disposal of the old siding panels in a dumpster or appropriate container. |
Adhering to these steps helps ensure a smooth and safe siding removal process. Each step plays a crucial role in maintaining the integrity of the project.
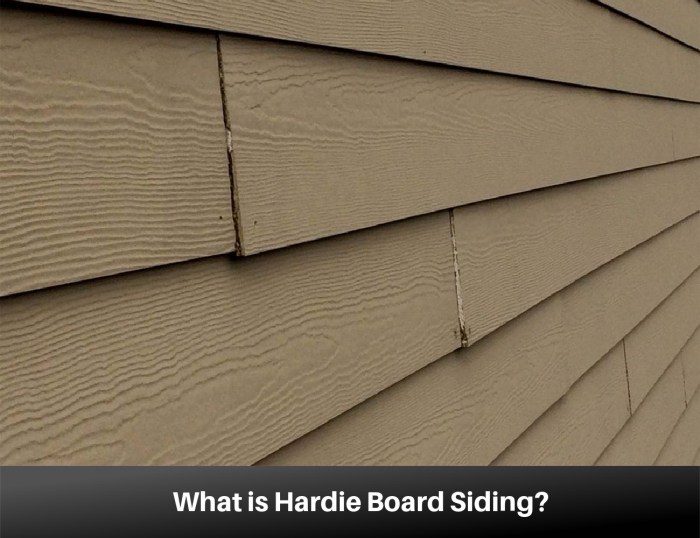
Choosing Materials for Hardie Board Siding Replacement
Source: craftsmanschoice.com
Selecting the right Hardie board siding material is crucial for a successful and lasting replacement project. Factors like durability, maintenance needs, and budget play a significant role in the decision-making process. Careful consideration of these aspects will ensure your new siding stands up to the elements and complements your home’s architectural style.
Types of Hardie Board Siding Materials
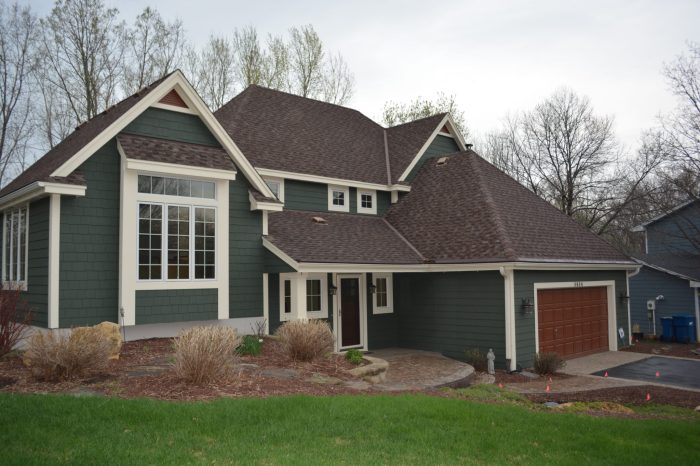
Hardie board siding comes in various materials, each with unique characteristics. Understanding these distinctions allows homeowners to make informed choices that align with their specific needs and preferences. Different finishes and colors are available within each material type.
Comparing Hardie Board Siding Options
Choosing the right Hardie board siding material involves weighing the pros and cons of each option. Durability, maintenance requirements, and the initial cost are all critical considerations. A thorough comparison helps homeowners determine the best fit for their budget and lifestyle.
Hardie Board Siding Material Comparison
| Material | Pros | Cons | Cost |
|---|---|---|---|
| HardiePlank | Known for its exceptional strength and durability, it offers a wide range of colors and textures, providing a natural wood look. | It can be more expensive than other options, installation can be slightly more complex. | Mid-range to high, depending on the specific finish and texture. |
| HardiePanel | A popular choice for its affordability, providing a consistent and smooth surface that’s easy to maintain. | It may not offer the same level of visual appeal as HardiePlank, and may not be as durable in extremely harsh conditions. | Lower to mid-range, depending on the chosen finish. |
| HardieSiding | A versatile material that blends well with various architectural styles, providing excellent weather resistance and a long lifespan. | It may require more specialized tools for installation, and depending on the specific application, it can have a higher cost compared to other materials. | Mid-range to high, depending on the specific finish and installation requirements. |
Selecting Siding for Your Climate and Style
The optimal Hardie board siding choice is influenced by the local climate and the architectural style of the home. For regions with high winds or significant temperature fluctuations, a more robust material might be necessary. Matching the siding’s texture and color to the home’s architectural style is vital for a cohesive and aesthetically pleasing outcome. Consider your specific home’s design elements, including rooflines and window styles, when selecting the siding.
Installation of New Hardie Board Siding

Source: sidingauthority.com
Installing new Hardie board siding requires meticulous attention to detail and adherence to proper techniques to ensure longevity and a professional finish. This crucial step involves more than just attaching boards; it encompasses crucial considerations like ventilation, drainage, and the precise application of fastening methods. Understanding these aspects is vital for preventing future problems and maximizing the lifespan of your new siding.
Careful installation of Hardie board siding is paramount to its longevity. The proper application of fastening techniques and consideration of ventilation and drainage are critical factors in preventing issues like moisture damage, warping, and premature deterioration. The following sections delve into the process, focusing on precision and the importance of correct installation methods.
Fastening Techniques for Hardie Board Siding
Appropriate fastening methods are critical for the structural integrity and longevity of Hardie board siding. Incorrect fastening can lead to premature failure and potential damage to the underlying structure. Choosing the right fasteners and using the correct techniques are vital for a strong and enduring installation.
| Method | Description | Pros | Cons |
|---|---|---|---|
| Nail Gun with Appropriate Nails | Using a nail gun with specialized Hardie board nails is a common and efficient method. The nails are designed to penetrate the siding material effectively without causing splitting or damage. | Fast, efficient, and generally effective for most applications. | Requires proper training and expertise to avoid damaging the siding. Incorrect nail size or depth can cause issues. |
| Screw Gun with Appropriate Screws | Employing a screw gun with appropriate screws is another reliable option, providing a more secure fastening method compared to nails. The use of specialized Hardie board screws is essential. | Offers higher security and durability, resisting more rigorous weather conditions compared to nails. | Slightly more time-consuming than using a nail gun, and requires specialized screws. |
| Hand-Driven Screws | In situations where power tools are unavailable, hand-driven screws can be utilized. | Offers flexibility in difficult-to-reach areas and provides a secure fastening method. | Significantly slower than power tools, and requires more manual effort. |
Proper Alignment and Ventilation
Precise alignment of Hardie board siding panels is crucial for a visually appealing and structurally sound installation. Misalignment can lead to gaps, creating opportunities for moisture intrusion and compromising the overall aesthetic. Using a level and measuring accurately are vital steps in the process. Regularly checking the alignment of each panel is critical during installation.
Proper ventilation is equally important. Adequate airflow behind the siding prevents moisture buildup and allows for the evaporation of any condensation that might occur. Improper ventilation can lead to significant issues like rot, mold, and warping, which significantly shorten the life of the siding.
Steps in Installing New Hardie Board Siding
A meticulous and well-structured installation process is critical for ensuring the durability and longevity of your Hardie board siding. Follow these steps carefully for optimal results:
- Thoroughly inspect the existing framing and ensure its stability and integrity.
- Measure and cut the Hardie board siding panels to the precise dimensions required for each section.
- Secure the first row of siding using the appropriate fasteners, ensuring correct spacing and alignment.
- Continue installing the siding panels, meticulously checking the alignment and gaps.
- Ensure proper ventilation and drainage are maintained throughout the installation.
- Caulk any gaps or joints to prevent moisture intrusion and enhance the overall aesthetic.
- Inspect the completed installation for any irregularities or imperfections.
Importance of Correct Installation Techniques
Utilizing the correct installation techniques is critical for ensuring the longevity and stability of the Hardie board siding. This approach significantly reduces the risk of premature failure due to issues like moisture damage, warping, or detachment. Examples of projects where proper installation led to a successful outcome are readily available. By adhering to established installation procedures, homeowners can prevent costly repairs and maintenance in the future.
Considerations for Hardie Board Siding Replacement
Replacing your home’s siding with Hardie board can significantly enhance its aesthetic appeal and durability. However, careful consideration of various factors is crucial for a successful and cost-effective project. Understanding the associated costs, permit requirements, contractor selection, and warranties is essential for making informed decisions.
Careful planning and meticulous execution are key to a successful Hardie board siding replacement project. This section delves into crucial aspects of the process, ensuring you’re well-equipped to navigate the project effectively.
Cost Considerations
Material and labor costs are significant factors in determining the overall expense of a Hardie board siding replacement project. Material costs vary depending on the square footage of the area to be replaced, the specific type of Hardie board chosen, and any additional accessories required. Labor costs are influenced by the complexity of the project, the size of the team, and any necessary specialized equipment. For example, a larger, multi-story home requiring extensive siding replacement will naturally incur higher labor costs.
- Material Costs: The price of Hardie board siding fluctuates based on market conditions and manufacturer promotions. Expect to factor in the cost of materials, including fasteners, caulk, and other necessary components.
- Labor Costs: Contractors typically charge by the hour or by the square foot for installation. Get detailed estimates for labor costs from multiple contractors to compare prices.
- Permit Fees: Local building codes often require permits for siding replacements. These fees can vary based on the municipality and the scope of the work.
Permitting and Approvals
Obtaining the necessary permits and approvals before commencing a Hardie board siding replacement project is crucial. Local building codes often require permits for exterior renovations, including siding replacements. Failing to obtain these permits can lead to significant issues later, such as fines or project delays. Checking with your local authorities for specific regulations and procedures is essential.
- Building Codes: Local building codes dictate the requirements for siding installations, including material types, installation methods, and necessary inspections.
- Permit Requirements: Detailed documentation and adherence to permit specifications are critical to avoiding issues and ensuring a smooth project process.
- Inspection Procedures: Understand the inspection process, which is crucial for compliance and ensuring quality installation.
Contractor Selection
Selecting the right contractor is vital for a successful Hardie board siding replacement. Experience and expertise in Hardie board siding installations are key factors. Look for contractors with a proven track record, positive customer testimonials, and strong references. Thorough research and careful vetting are essential.
- Contractor Experience: Seek out contractors with a proven track record of successful Hardie board siding projects. Look for companies specializing in exterior renovations and possessing extensive experience with this material.
- Contractor Licensing: Verify that contractors are properly licensed and insured. Licensing ensures adherence to local regulations.
- References and Reviews: Request references from previous clients to assess the contractor’s work quality and reliability. Online reviews and testimonials can also offer valuable insights.
Warranties and Guarantees
Warranties and guarantees provided by manufacturers and installers are crucial considerations. Hardie board siding often comes with a manufacturer’s warranty. Ensure that the contractor’s installation practices are aligned with the warranty terms.
- Manufacturer’s Warranty: Hardie board siding manufacturers typically offer warranties on their products. Verify the warranty details and ensure the contractor’s work is compliant with the manufacturer’s specifications.
- Contractor’s Warranty: Inquire about the contractor’s warranty on their installation services. This warranty will cover any potential defects or issues arising from their work.
- Warranty Coverage: Understand the specific terms and conditions of any warranties provided, including the duration of coverage, exclusions, and the process for making claims.
Frequently Asked Questions
- What are the average costs of Hardie board siding replacement? Average costs vary significantly depending on factors like the size of the home, the type of Hardie board used, labor costs in your area, and the complexity of the installation. Detailed cost breakdowns are best obtained from qualified contractors.
- How long does a Hardie board siding replacement project typically take? Project timelines depend on the size of the home, the complexity of the work, and the availability of materials and labor. A qualified contractor can provide a realistic timeframe for your project.
- What are the common signs that indicate a need for Hardie board siding replacement? Signs include significant damage, discoloration, or structural issues. Consulting a professional is recommended for accurate assessments.
Maintenance and Troubleshooting
Proper maintenance is crucial for extending the lifespan and preserving the aesthetic appeal of Hardie board siding. Regular care and prompt attention to potential issues can prevent costly repairs and maintain the integrity of your home’s exterior. Neglecting maintenance can lead to significant damage over time, requiring extensive and expensive replacements.
A well-maintained Hardie board siding system will remain attractive and functional for many years, providing a reliable defense against the elements. This section will cover common maintenance practices and troubleshooting methods for addressing potential issues.
Importance of Regular Inspections
Regular visual inspections are essential to identify minor problems before they escalate into major issues. Checking for signs of damage, such as cracks, gaps, or discoloration, is crucial for timely intervention. This proactive approach can prevent water damage, pest infestations, and the need for extensive repairs. Promptly addressing small issues can save significant costs and prevent future structural problems. Regular inspections can help you notice any early signs of damage, allowing you to address the issue before it becomes more serious and expensive to repair.
Common Issues and Damage
Hardie board siding, while durable, is susceptible to certain types of damage. Weather-related issues, such as strong winds, hail, and prolonged exposure to moisture, can cause damage. Similarly, pest infestations, particularly by insects that bore into the siding, can lead to unsightly holes and structural weaknesses. These issues, if left unaddressed, can compromise the siding’s integrity and require costly replacements. Understanding potential problems allows homeowners to proactively address issues and avoid significant damage.
Troubleshooting Common Problems
Addressing minor damage promptly is crucial to preventing larger problems. Small cracks can be repaired with specialized patching compounds, while minor pest damage can be addressed by removing affected areas and replacing them with new Hardie board. If water damage is suspected, immediate action is essential to prevent further deterioration. This includes drying the affected area and applying appropriate sealants to prevent future water infiltration. A thorough understanding of repair techniques allows for effective solutions to minimize damage and maintain the quality of the siding.
Maintenance Practices
Regular cleaning is essential for maintaining the appearance and integrity of Hardie board siding. Washing the siding with a mild detergent and water can remove dirt, grime, and other accumulated debris. Using a soft-bristled brush or a pressure washer (at low settings) can effectively remove surface contaminants without damaging the siding. This simple practice can significantly improve the appearance of the siding and prevent the buildup of elements that can accelerate damage. Thorough cleaning is a key component of proper maintenance, preserving the siding’s aesthetic and extending its lifespan.
Table of Common Hardie Board Siding Problems and Solutions
| Problem | Description | Solution |
|---|---|---|
| Cracks | Small or large cracks appearing in the siding | Repair with specialized patching compounds, or replace the damaged section. |
| Water Damage | Evidence of water penetration or leaks behind the siding | Identify the source of the leak, repair it, and dry the affected area. Apply appropriate sealants to prevent further water damage. |
| Pest Infestation | Visible holes or signs of insect activity in the siding | Remove infested areas, treat with appropriate pest control methods, and replace damaged sections with new Hardie board. |
| Discoloration | Changes in color or fading of the siding | Cleaning with mild detergent and water, or professional cleaning if needed. |
| Loose or Damaged Panels | Panels that are loose or show signs of damage | Secure loose panels, or replace damaged panels. |
End of Discussion
In conclusion, replacing your Hardie board siding can significantly enhance your home’s appearance and longevity. This guide has provided a thorough overview of the process, from initial assessment to final installation. By understanding the different options, preparation steps, material choices, and installation techniques, you’ll be well-equipped to tackle this project confidently. Remember to prioritize safety, consider your budget, and select qualified professionals to ensure a successful and lasting outcome. This guide provides a solid foundation for your siding replacement journey.